
A Solo Woman Traveling uses human-written content that contains affiliate links and is a member of Amazon Services LLC. When you make a purchase on a link, we may receive a small commission. This is at no extra cost to you. See Our Affiliate Policy and Advertiser Disclosure for more info.
Are you a travel blogger looking for another way to impress your audience with your recommendations? A great new way to share your hidden gems for restaurants, hotels, or any location, is a pre-loaded Google map. In this step-by-step guide, I will show you how to make a downloadable map for your blog!
How To Make A Lead Magnet Downloadable Map
Why Do I like Google Maps?
If you search the web on how to make lead magnet a downloadable map, many creating your map sites will come up. After doing some quick research, I came back to Google; it’s the best, in my opinion.
What I like most about Google Maps is that once shared with someone, it will download into the app’s “your maps.” Nothing is better than having something just automatically downloaded into the right place for easy use.
First Step to Make A Downloadable Map
The first thing you want to do is make sure you have a Google account. Log in, sign up for a Google account, and then go to Google Maps.
Google maps will display a map of your current location. From this point, you want to go to the top left corner of the map and click on the three stacked horizontal lines. A drop-down menu will appear. The option you want to choose is Your Places.
Then in the box that opens, you want to click on the MAPS option on the far right. Once you have clicked on maps, you will see at the bottom of that box CREATE A MAP. Click that option.


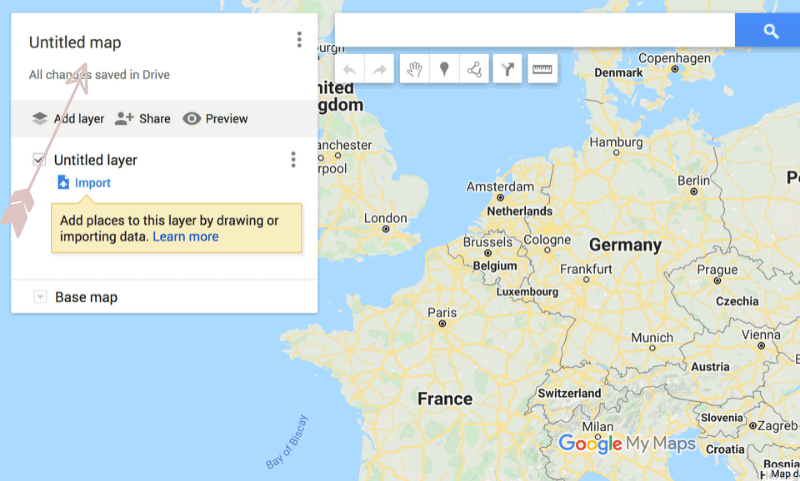
Now you will have a blank map ready to start creating. This is where you are going to personalize this map with all the points of interest you want to reference.
How to Personalize the Downloadable Map
Now that you have hit create and have a blank map before you, it’s time to make it your own.
Start with naming your map by clicking on the Untitled Map. From here, you will fill create a name for it and a brief description. I reference the blog post and the city—for example, the Map of Copenhagen.
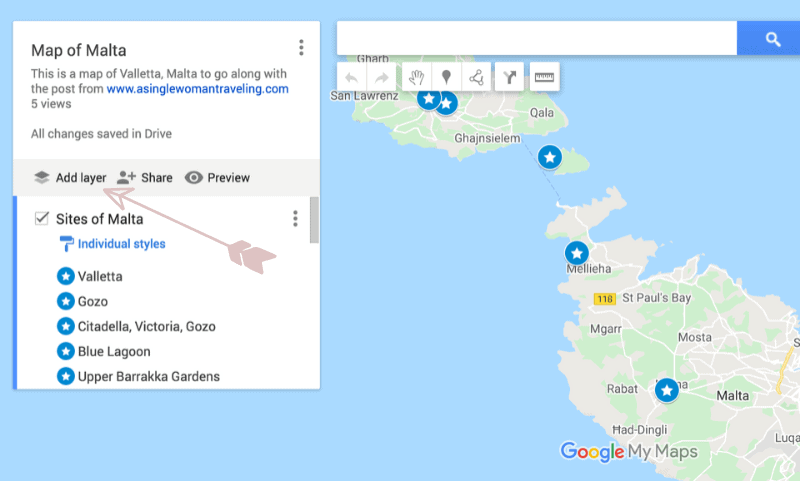
Once you have named your map and added your city in the search bar, save the location. It will ask you if you want to Add to Map. Click this button, and adding the site to the map. You can customize one step further by choosing an icon and color for this point of interest.
For this example, I have a blue icon with a star. I renamed the “untitled layer” with “Sites of Malta.” Now you can add more of the same types of points of interest to this section. If you want to add a new section with a layer for “restaurants,” you can click the untitled layer below the one you created. Add as many layers as you want.
(Disclaimer: Some links in this post may be affiliate links, meaning if you click on the link and make a purchase, I receive a small commission. This is at no extra cost to you, and you may even receive a small discount. See disclosure for more information.)
Saving and Sending the Downloadable Map
Once you are finished and have all the information on the map, it’s time to send it. You can share the customized map as a direct link. To get the send link, you click the Share button next to Add A Layer.
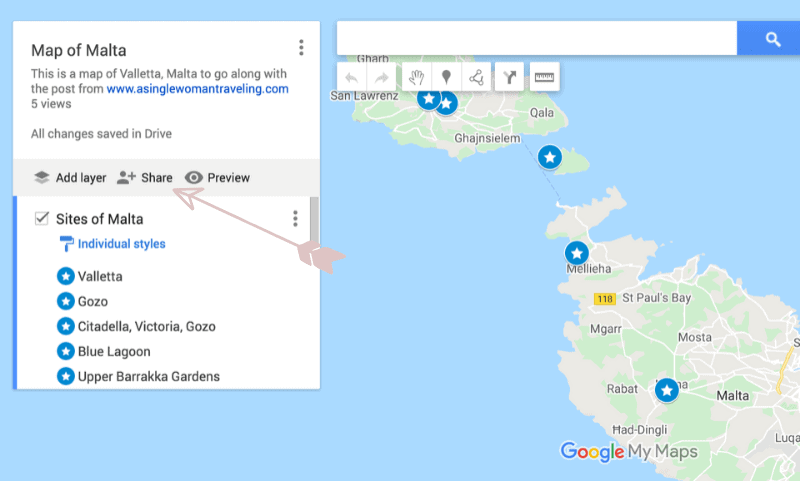
A screen with the link to share will pop up, but FIRST, you need to change the privacy. If you don’t change the viewing access and leave it private, no one will be able to open this map.
Click the Change button next to where it says Private; only you have access. You want to select a feature here. I always choose to use the 2nd option, Anyone with the Link.

Copy and paste this link to whoever you want to have a copy. This is the link we will use in your automated email to everyone who requests the map, so also keep a copy saved.
Bonus: Add the map to your site directly with an embed
Maybe you are not ready to share the map as a link in an automated email. If you just want to add the map directly into your blog, follow these steps.
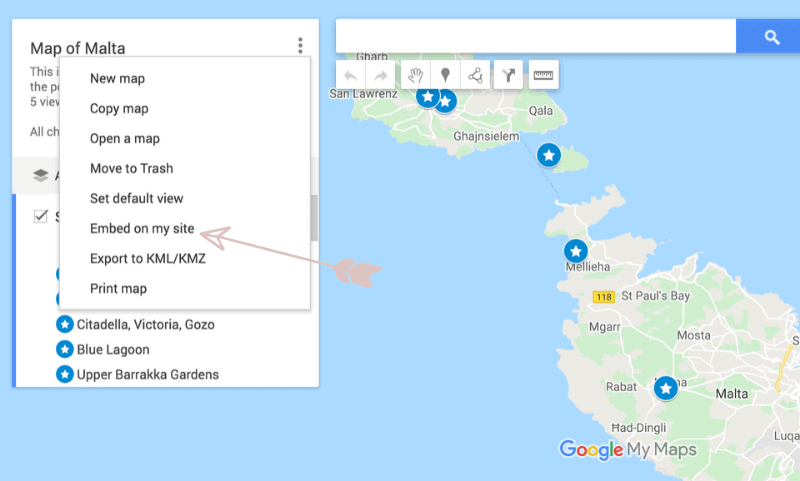
- Go back to the share access section and change it to Public, “anyone on the Web.”
- Click the three vertical dots, as seen below.
- Get the embed code.
- Grab the embed code and put it directly into your site with an HTML widget.
Setting Up Automation, Sending The Downloadable Map
Here is where we take it to the next level and set up automation. This process is easy, just time-consuming. Once you have all the steps down, it will flow a bit quicker.
There are a lot of ways to do this process with automating platforms. I will teach you how to do this with Lead Pages & Active Campaign. (Affiliate Links)
These 2 platforms will work together to do the following:
- Generate a form completion in Active Campaign
- Default to a page with instructions on what to do next for the map
- Add a contact to your subscribers’ list
- Add a tag to this person so you can categorize them as a contact
- Automatically send them the map you created
Sign up for Active Campaign and Lead Pages
Both these sites have free trials, but both will cost a monthly (or yearly fee). You need to decide if you are ready to invest in platforms to do automation for you. If you are a new blog, you may want to explore other platforms that have free services, such as Mail Chimp.
If you have decided you don’t want to use either Active Campaign or Lead Pages, you can still read on to see the process, then use it with the service you chose. The process would be a little different, but the concept is the same.
Active Campaign Set Up
Active Campaign has excellent tutorials on how to use the platform. I will not go into detail for all the functions of this service. My instructions will be what order you want to do specific steps to get your map out to subscribers seamlessly.
The Steps:
- In Active Campaign, Create a List for this downloadable map. I label my list Map of Malta.
- Create the Form for which your subscriber will complete. When you create the Form you – Subscribe them to the list for Map of Malta & Add a tag for Map of Malta. You will find this capability in the Options tab with the Form you are creating. Photo below.
- Opt-In Settings- If you need to send an Opt-in for subscriptions based on the country you live, be sure to do this in the Form using the “options” tab. The way to EDIT the opt-in email is to click on the setting button in the Subscribe to a list action- Next to Map of Malta.
- When finished, press Integrate and save your HTML code for your Form created in Active Campaign. Get ready to use this later when you create your lead page for this map promotion.

Lead Pages Set Up
Lead Pages is a platform for creating more beautiful landing pages, pop up, and forms than Active Campaign has to offer. Once you have created your account and familiarized yourself with how to use this platform, you are ready to go to the next step.
- Create a Landing page for your map. Include a short message to the subscriber, letting them know that they will receive the map upon subscribing. When you create this landing page, you want to add a custom HTML box and paste the HMTL code from the Active Campaign form you created.
- Create a Thank You page in Lead Pages for when someone fills out your form. This page is what will appear after submission, letting them know to check their email for the opt-in page confirmation.
- It is also an excellent idea to let the person know they may need to check their spam folder for the email. Once you create this page, take the URL and copy and paste it back into the Active Campain form box under “Options” then “On Submit.” Picture below.


Setting Up The Automation
Finally, you are almost done! It is a lot of work to get this setup, but it pays off when you see your subscriber list grow and grow!
For the last portion of setting up this automation of How to Make a Downloadable Map, you head back to Active Campaign.
- Start by Clicking on the form you created, “Map of Malta.”
- Go to the top right corner, “trigger automation” and select.
- Click the + button and select the top option that says Send an Email.
- Then you want to create an email.


When you create your email, be sure to include the link to your downloadable map. This is where you will paste the link from Google maps that we made at the beginning of this post. The email could look a little like something below.
After you have saved and exited the email you created, you want to end the automation. To do this, go to the menu on the right and click the drop-down for conditions and workflow and drag over the “end automation.”
Final Steps on How to Make A Downloadable Map
You have EVERYTHING ready to go, so now it’s time to add this to your blog post!!
This next step is up to you on how you want to implement it. I create a fun graphic in Canva to go along with this map. You can see an example below. If you use a graphic, you add it as an image to the blog post, then link your Lead Pages URL to the Map of Malta. Alternatively, you can just say, Click here for a map, and link your Leadpages URL to the text.
Curious about Malta? Check out the post here!
Stay in Touch!


Thank you for sharing! I have been wanting to learn how to do this-I will have to go through your steps and give it a shot! Thanks for sharing-so helpful!
Oh, I did not know that is possible. You explained well. Thank you very much.
Ooo, this is definitely gonna be useful for the future! Thanks so much for the tutorial!
wow, don’t know you can do it on google, I only notice that if you preload google map in an area, when you go off line, you can still have it and use it!
This is absolutely a great tip for both traveller without a data plan on the go, and travel blogger who wants to embed a map or make a map freebie, thanks!
Oh wooow girl, as a travel blogger – this is a dream to read! I just saved it to my favorites because I NEED to make these for my travel guides. Thank you so much for sharing. It was so informative! Also such a great idea to make it actual downloadable (is that a word?) instead of just showing it in the blog post. It makes me so excited to build the landing page and it’s such a great way to grow your e-mail list I suppose!
haha this is EXACTLY how I plan, travel and share! I get friends sending me questions on where to eat or drink in a certain city and if I’ve been then I just send one of these maps over! It’s SO handy! PS – clever way to load up on emails!!
finding a good place to eat is like finding gold! Food is why I travel, lol!
This is a life-saver! i cannot say how many times I needed map that wouldnt be online. Awesome post!
thanks so much!! if you have more questions, let me know!!
Wish I had come across this guide earlier when I was breaking my head trying to figure out how to create a map! Your explanation makes it so easy! Will save it for when I’m ready for the automation part.
Wow this is so helpful!! I used your guide and referenced back to it several times as needed. thanks for the help!
So good to hear! If there was anything you had questions on, let me know!